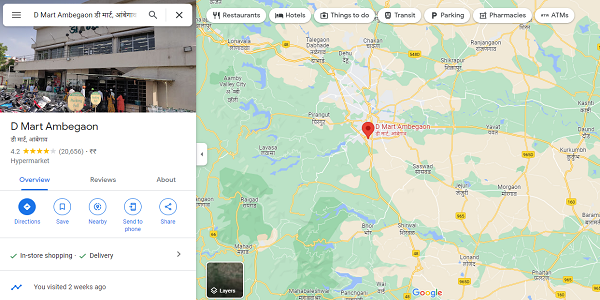
गुगल वरती व्यवसाय नोंदणी ( Create Google My Business Account In Marathi )
Google My Business हे तुमचा कोणत्याही प्रकारचा व्यवसाय वाढवण्यासाठी उपयोगी आहे
या मध्ये कोणत्याही प्रकारचे पैसे तुम्हा आकारले जात नाही .या नुसार तुम्ही तुमच्या व्यवसायचा पत्ता व ठिकाण इतरांना सहज पणे दाखवू शकता ते हि मोबाईल च्या साहाय्याने .
चला तर मग आपण या बद्दल आणखी माहिती घेऊ .
सर्व प्रथम तुम्हाला एका G -Mail खात्याची आवश्यकता पडेल हे खाते कशे बनवायचे ते पाहूया :-
गूगल जीमेल खाते तयार करण्यासाठी, खालील प्रक्रियेचे पालन करा:
google.com/gmail वर जा.
१) नवीन खाते तयार करा" या बटण्यावर क्लिक करा.
२) अपले नाव, ई-मेल व पासवर्ड प्रविष्ट करा.
३)मोबाईल नंबर ,जन्मतारीख प्रविष्ट करा.
३) अधिक माहिती प्रविष्ट करून, नवीन खाते तयार करण्याची पुष्टी द्या.
५) तुमच्या मोबाईल वरती एक कोड येईल तो प्रविष्ट करा. व पुढे जा
६) तुमच्ये खाते तयार झाले आहे
७) आता तुमचा ई-मेल व पासवर्ड प्रविष्ट करा व लॉगिन करा
गुगल माझा व्यवसाय खाते तयार करण्यासाठी तुम्हाला खाली बाबी लक्षात असुद्या :
१) सर्व प्रथम तुमचे गुगल ब्राऊसर उघडा
२) google.com/business वर जा.
३)तुमचा ई-मेल व पासवर्ड प्रविष्ट करा व लॉगिन करा
४)आपले व्यवसायचे नाव प्रविष्ट करा.
५) व्यवसाय प्रकार निवडा
६) व्यवसाय लोकेशन निवडा
७) व्यवसाय संपूर्ण पत्ता प्रविष्ट करा.
८) मोबाईल नंबर व्यवसाय संकेस्थळ प्रविष्ट करा.
९) पुढे जा तुमचे खाते बनले आहे
परुंतु हे खाते चालू करण्यासाठी तुम्हला गुगुल व्यवसाय व्हेरिफिकेशन
करावे लागते .
त्या साठी Verify now या बटन वर क्लिक करा
या नंतर १२ दिवसांच्या आत तुम्हला गुगल कडून कोड मिळतो तो मिळाल्या नंतर पुन्हा इथे येऊन प्रविष्ट करा .

संपूर्ण प्रक्रिया इंगर्जी भाषेत पहा (How to Create google My Business )
Create a Google Account
- Go to the Google Account sign in page.
- Click Create account.
- Enter your name.
- In the "Username" field, enter a username.
- Enter and confirm your password.
- Tip: When you enter your password on mobile, the first letter isn't case sensitive.
- Click Next.
- Optional: Add and verify a phone number for your account.
- Click Next.
Use an existing email address
- Go to the Google Account Sign In page.
- Click Create account.
- Enter your name.
- Click Use my current email address instead.
- Enter your current email address.
- Click Next.
- Verify your email address with the code sent to your existing email.
- Click Verify.
Sign up for Business Profile
- On your computer, sign in to your Google Account, or create one.
- If you create a new Google Account, sign up with your business email domain.
- Go to create a profile.
- Enter the name of your business. You may also be able to select your business from the list of suggested businesses as you type.
- If you get a message that someone else has already verified the business, request ownership of the Business Profile.
- Search for your business category.
- Click Next.
- Choose whether you have a location customers can visit.
- For businesses with a storefront staffed during business hours: Click Yes.
- You may be asked to enter your business address or position a marker on a map for the location of your businesses. When finished, click Next.
- For businesses that don't have a storefront staffed during business hours: Click No.
- For businesses with a storefront staffed during business hours: Click Yes.
- Enter the service area of your business.
- You can set your service area based on the cities, postal codes, or other areas that you serve. You can add up to 20 service areas.
- Tip: We recommend you do not extend the boundaries of your overall area farther than 2 hours driving time from where your business is based. For some businesses, it may be appropriate to have a larger service area.
- Enter a phone number and website URL.
- Click Next.
- You also have the option to create a website based on your information.
- Tip: We recommend entering the individual phone number or store page for each location, rather than a remote call center.
- Click Finish.
- Select a verification option.
- Tip: We recommend reviewing your information before you request verification.
- To verify now: At the top, find the red banner and click Verify now.
- To verify later: Click Verify later
Later.
- If you’re not authorized to manage the Business Profile for the chain: Find the person in your organization who’s authorized and continue the process.
- Tip: We recommend reviewing your information before you request verification.


